Homes get built in many ways. Some people meticulously plan and draw every aspect of the home, often with the help of an architect or designer. The house plans can be many pages and layers of drawings. They may include not only the physical structure, but the window, door, trim and insulation schedules as well as all mechanical systems and landscaping. Other people start with an over sized piece of graph paper and make a single line drawing that may not even be to scale. Decisions will then be made on an ‘as needed’ basis. Either approach, and any in between, will eventually involve decisions that will affect the geothermal system.

The 2 Most Important Considerations for New Home Construction
There are many aspects to consider when planning your home such as:
What is the best functional layout for our kitchen? Do I need an exhaust fan?
Should I have a formal dining room? Will we actually eat there?
What about garage space? Should we park the lawn mower in there?
How much recessed lighting fixtures do we really need to be able to see?
or how about: how many closets should I have?
While all of these questions (and thousands of others) are certainly worthwhile and needed, from a geothermal comfort level, there are really only two questions to ask:
#1: What will be our heat loss? and
#2: How will the duct work be laid out?
Heat Loss
A geothermal system is best when a detailed and accurate heat loss/cool gain is calculated. The designer needs to know all sorts of things about the home to be accurate. Firstly, a heated space needs to be defined. It may seem very basic, but it’s surprising how many people do not consider if they are going to finish off the basement, or that big space over the garage or they notice (after it’s built), their attic is big enough to have a game room. A homeowner may decide the three-season room needs to be fully heated. This type of "after the fact" expansion can cause many problems with the initial system design and the homeowner’s satisfaction with the end product.
Defining the Heated Envelope
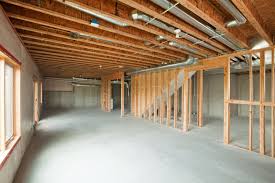
The basement and the attic are recurring areas of confusion. There are two ways to handle the basement. The ceiling can be insulated with R-25 fiberglass batts or equal. This puts the basement in unheated space. Any duct work in the basement will then need to be insulated to R-8 and heat transfers in the duct work are lost to the basement. The other option is to insulate the foundation walls of the basement which puts the basement inside the heated area of the home. In this case, and heat transfer from the duct work are not lost to the outside but remain in the envelope.
The top of the house can be the insulated floor of the attic, which makes the attic unheated. Alternately, spray foam could be installed in the rafters and end gable walls to enclose the attic into the heated envelope. The designer needs to know which way this will be handled because this will change things similarly to the basement scenario. Even well-installed ducts in an unheated attic have a heat loss/cool gain. Poorly air sealed and insulated ductwork in a hot summer attic is a particularly onerous situation. Both of these areas of the home need to be decided on, and that decision should not change.
Insulation Level and Type for All Exterior Surfaces
We see this decision is often put off or altered on the fly. Different insulation systems result in different R-values, and more importantly, different levels of air tightness of the structure. A common issue is we design for spray foam in the walls, but when the quotes come in, the homeowner backs down to cheaper conventional insulation.
Window Sizes
Windows, especially sliding doors, seem to have the habit of growing. Even if the plans call for a six foot slider, we are rarely surprised to find a nine footer was actually installed. Since the walls are R-25, and the slider is R-3, the extra glass area can affect the heat loss. A really nice view might be cause for the owners to expand the original window sizes. South facing glass is a net gain, so not all expansions of glass area are bad. Unfortunately, not all really nice views face south. Transom or half round windows are items that can show up after having been omitted in the plan.
Ceiling Heights
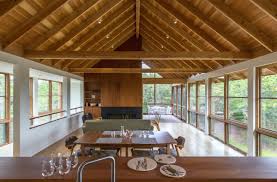
The presence of vaulted ceilings are often not detailed on plans or are a late change, but they change the heating requirements by increasing the surface area and volume of the space. It is also more difficult to get high R-values in the more limited space of a cathedral ceiling. A vaulted ceiling may also change the duct layout to help de-stratify the air, or maybe a good spot to consider a ceiling fan.
Skylights and the Associated Light Wells
Skylights add the same concerns as windows. The associated light wells that often go with them change the volume and heat loss area similar to a cathedral ceiling. Skylights are not of much use for passive solar since they are at the same angle as the roof. This reduces their ability to collect lower angle solar rays in the winter but is more effective in collecting the sun’s higher angle rays in the summer (bad)
Duct Work Layout
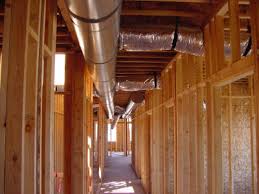
Once all of the items above have been decided upon, the designer can calculate the required airflow for every room in the home. The duct sizes are then calculated based on static resistance and balanced using a technique called ‘total effective length’. The geometry of the duct layout is also important. The length of the duct and the type and number of fittings all affect the duct sizing. The objective is to design a system that delivers the correct volume of air throughout the home in a balanced fashion. Some forethought of where the ducts and equipment will be placed reduce the need for on the fly decisions. Simple choices can be made to accommodate the duct system and result in a non-intrusive system. Here are some factors that can impact the duct system.
Equipment Location
A great way to start off the design is to locate the equipment in as central a location as possible. I know this sounds like we prefer to plop the unit right in the middle of your basement and occupy the best real estate. However, King Energy maintains that this will result in the simplest duct layout as well as the most usable space in the basement.
Let’s just think about a four ton unit that puts out 1600 cfm of airflow and it is located in the middle of a 24′ x 40′ basement. The supply trunk duct work would leave the supply plenum in each direction carrying 800 cfm each. The longest run will be 20 ft of trunk and 12 ft of branch. Other factors intrude, but in this example, let’s call it a 32′ run and we are starting at 800 cfm. A typical trunk off the plenum in this case would be 8″ high and 16″ wide. This would tuck nicely beside the main carrying beam and would get incrementally narrower as air flow is taken off of it. Since most return air duct work is in the center of the home, the return duct work is short and close.
Now let’s pull the equipment to one end of the basement. In this layout, we have one supply trunk that needs to carry the full 1600 cfm of air. Also, the longest run is now the full 40 ‘ length of the basement, plus the 12 ‘, or 52’. This would require a supply duct in the range or 12″high and 24″ wide. Since the insulation also takes up space, this duct could hang 16″ below the floor joists, or clearly within what we call ‘head banger range’. This condition would exist until we get to the original central location at which point, the outgoing duct looks similar to the first case. This impinges on head room for half the basement. Also, you now have to bring the centrally located return air duct across half of the basement. In the end, half of the basement is cluttered with low headroom duct work.
The first layout reduces the space occupied by the duct, enables "side to side zone control, reduces the heat loss of the duct and reduces the static pressure loss.
Beams and Joist Layout
We are concerned about the space requirements of the duct system, especially as it relates to head room and the complexity of the duct. We try to use layouts that eliminate the need for trunk ducts to go under the beams, as they are more in the way. Also, once a branch line is in a bay, we prefer they run out straight to the end. The framing system of a basement ceiling can help or hurt the duct system. The simplest layout is a carrying beam running the long dimension of the basement and floor joists that are laid on top of the beam, spaced 16″ on center. The trunk duct would run parallel to the beam, and branch lines can originate off of the top of the trunk and run to the outside wall in the space between the joist (the bay).
Not all framing is done this way.
Another beam layout is called a flush beam. This is a beam that has the joists hung on the side of it. Flush beams have the advantage of allowing a trunk duct to pass under them but they also have the effect of cutting off the bay preventing branch lines from continuing. Floor headers are a type of flush beam and have similar effects. The joists also can impact the duct system. Some home designers will use multiple carrying beams some rotated 90 degrees from each other, and then the direction of the floor joists also changes. This can complicate the trunck duct layout and often forces us to go under the beam.
Typical joists are 2″ x 10″ spaced 16″ on center. There are many variations. Spacing the joists closer can complicate the ducts as the bay gets more narrow, and using joists of less depth makes the bay shorter.
There are prefabricated joists called TJIs. Wide varieties of joist height and thickness are available. The top and bottom chord of the TJI can present problems for the ducts and need to be thought out in advance. Our favorite solution to duct work problems are 9′ basement walls. We can then be much more flexible with duct location. Some advanced attention to the duct locations when doing a framing layout can prevent many conflicts and make for a better result.
Risers
Multi story houses are often ducted with vertical riser ducts that go from the basement to the attic. We usually require a nominal 2′ x 2′ shaft going straight up that looks like a big laundry chute. Straight up is best as elbows are difficult in tight spaces. Care must be taken that the size of the shaft is not compromised by the foundation wall or the attic roof eaves. To avoid these problems, a central location is preferred.
The riser location will have a strong influence on the equipment location. Close connection to the plenums is the most efficient approach. The risers and equipment should be close. If a home needs risers, they should be drawn on the plans.
Zoning
Many homes require multiple zone control. This is usually accomplished using motorized dampers in the supply trunks where they exit the supply plenum. Every supply outlet downstream of the damper will be controlled by the damper. In the simple home described above, the equipment is in the center of the basement and allows each supply trunk to have a damper. If the right side of the house is all bedrooms, and the left is living space, the unit is located perfectly for two zones. The same is true for a two story house with risers. It’s a simple matter to control each supply trunk if the equipment is located at the border between the zones. If the equipment is located off to one end of the basement, a long and large separate trunk will be required for the more distant zones.
Return Duct Work
Return ductwork is important. The duct needs to be large. The newer ECM fan motors are particularly sensitive to high static pressure on the return side of the fan, and the amperage draw goes up when the return is choked off. We like a large, centrally located return low on the first floor and high returns on the second floor. A return in every room is not needed, nor often are they desirable. The important thing is that air being pumped into all spaces of the house can circulate freely to a return outlet that will allow it back to the equipment. A return in every room certainly affords that, but often at the cost of higher static pressure, more heat loss surface, more expense, and loss of more space.
With today’s more open floor plans, much of the home can be serviced by one or a few central returns. Attention needs to be paid to rooms that have doors likely to be closed (i.e. bedrooms). These should get either a dedicated return outlet or a transfer grill. This will allow the air being sent into the room to migrate back to the return plenum and prevent the room from being pressurized. These large central returns should be located on the plans as they can sometimes be hard to locate later.
Conclusion
In conclusion, the most important point is the benefits of planning. It’s hard to layout everything about a new home on paper, but the more the better. Changes on the fly will occur, but trying to keep them to a minimum is very helpful. Some thought about the duct system, the framing layout and the insulation schedule is needed.
Some changes are minor, but others can have serious repercussions on other systems in the home. Brainstorm about all of the features of your plans and how well they satisfy your wants and priorities. The more consideration you put into the planning stage the more adjustments you can make when they are the cheapest to execute. Many decisions will have a domino effect and these need to be thought completely through. When someone goes to the trouble and expense of building a new home they should expect to be happy with the result.
The comfort of your home is something that you should feel, not see or hear. It can often be overlooked but it is one of the most important consideration in a new home design. Insulating your home will always pay you back over time. Remembering the two questions: How tight is my home? and Where will my ductwork go? Will help keep you focused in the comfort of your home for decades and decades.






Comments